Organize and Discover Resources with Site24x7 Tags
Tags help you organize and manage monitors across your Site24x7 environment. You can use tags to group related resources, simplify monitor discovery, filter dashboards and reports, configure monitor groups, and streamline operational workflows.
Tags can be:
- User-defined: Created manually in Site24x7.
- System-generated: Automatically created by Site24x7 or synchronized from supported Third-Party Integrations or cloud services.
Use cases
Tags can help you:
- Group monitors based on the environment, application, team, or location.
- Filter dashboards, reports, inventory views, and alert lists for faster analysis.
- Dynamically organize monitor groups.
- Simplify large-scale cloud resource management.
- Automate monitor configuration using configuration rules.
- Streamline alert management and operational workflows.
- Organize custom dashboard widgets and generate environment-specific reports.
Tag types
User-defined tags are manually created within Site24x7 to classify and organize monitors. These tags can be created, edited, deleted, and associated with supported monitor types. Examples include Environment: Production, Team: Network, and Application: Payments.
System-generated tags are automatically created by Site24x7 based on monitor attributes, integrations, or discovery behavior. These tags cannot be edited or deleted, and they help classify discovered resources consistently. System-generated tags are also imported for resources from external platforms, like AWS, Microsoft Azure, Oracle Cloud Infrastructure (OCI), Cisco Meraki, and VMware NSX-T, and discovery workflows. These tags are synchronized during monitor discovery and data collection, which happen periodically.
These tags:
- Cannot be modified directly within Site24x7.
- Update automatically when changes occur on the source platform.
Tag synchronization is currently supported for select integrations, including the following:
When resources are discovered through supported integrations:
- Existing cloud-provider tags are imported automatically.
- Newly added tags synchronize during data collection for the specific resource.
- Removed tags may also be removed from the corresponding monitors in Site24x7.
For supported integrations, the imported tag synchronization behavior depends on the integration type. Some integrations allow you to disable tag importing during discovery or to manage synchronization settings.
Create a tag
To create a tag, follow the steps below:
- Log in to Site24x7.
- Navigate to Admin > Tags > Add Tag.
- Provide the following details:
- Tag Name: Specify a unique name to identify the tag category.
- Tag Value: Enter a value to classify or group monitors under the tag.
- Tag Color: Choose a color to differentiate the tag visually.
- Click Save.

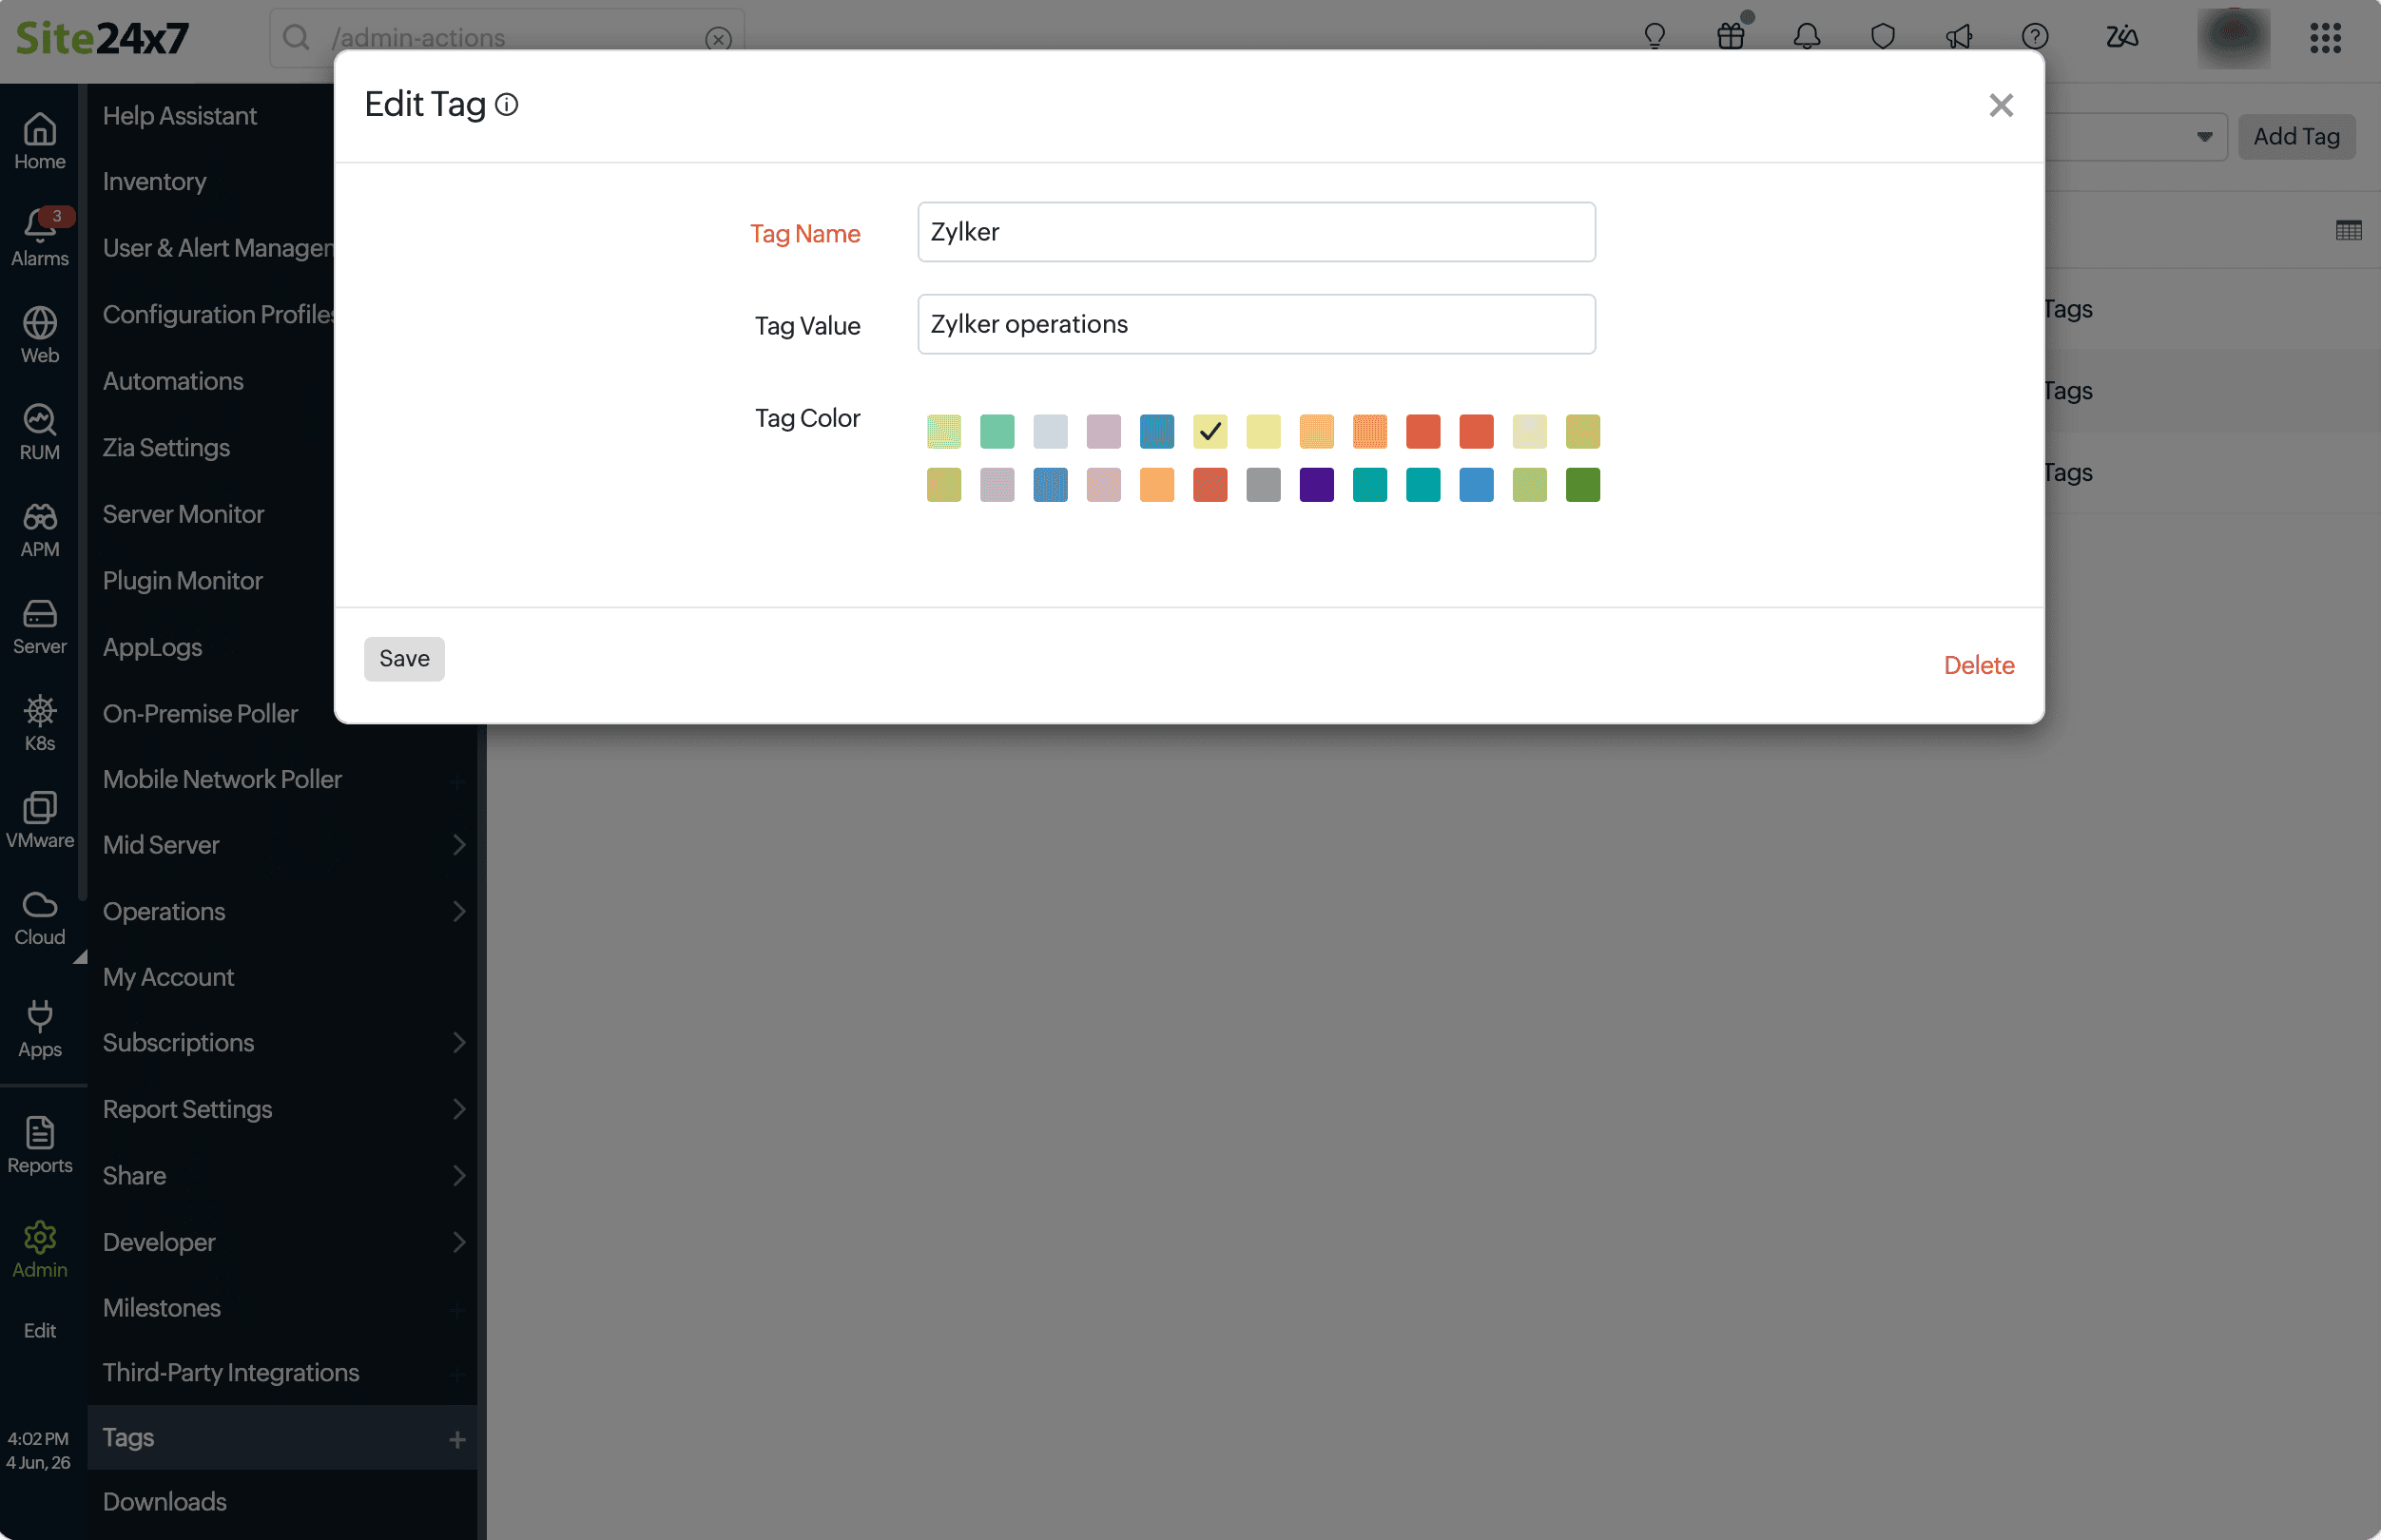
Edit or delete a tag
To edit or delete a tag, follow the steps below:
- Navigate to Admin > Tags.
- Select the desired tag.
- To edit it, modify the Tag Name, Tag Value, or Tag Color, then click Save.
- To delete it, click Delete.
Bulk tag operations to associate tags with monitors
To perform bulk tag operations:
- Navigate to Admin > Inventory and select Modify Tags under Monitor Configuration.
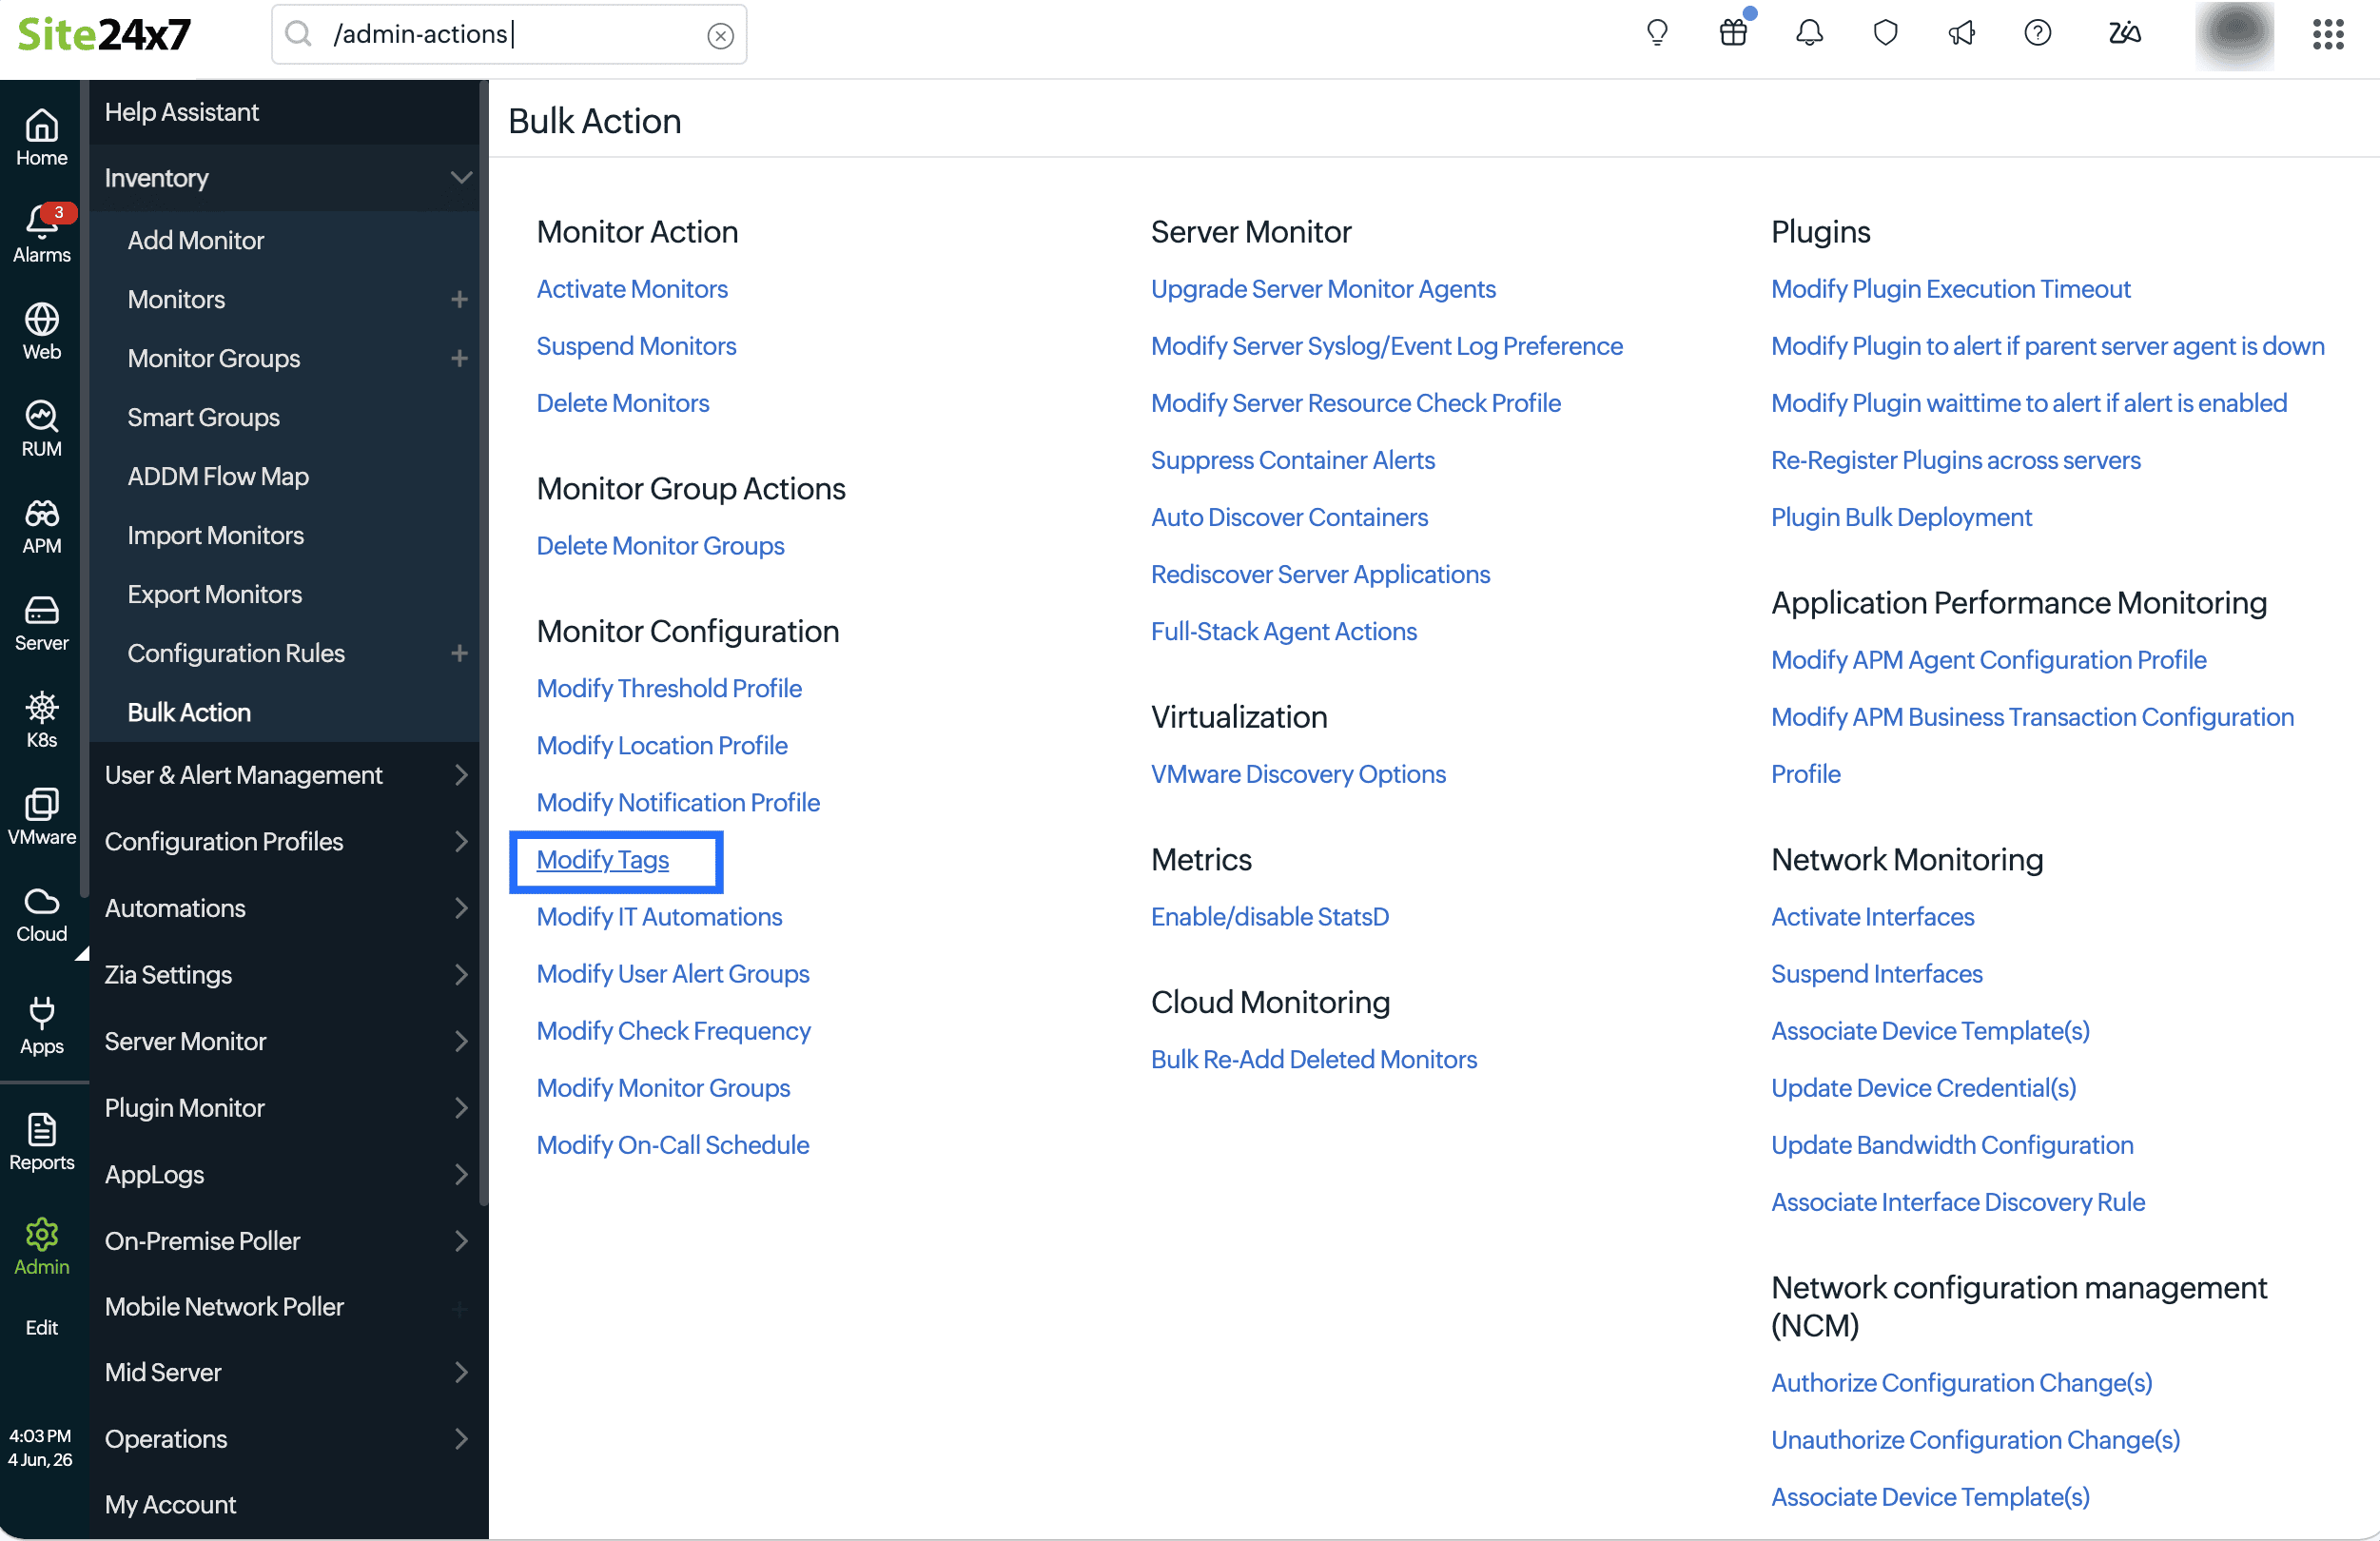
- Use the Advanced Search Filter to identify monitors based on specific conditions, such as the Monitor Name, Monitor Type, or Tags. You can combine multiple conditions using AND /OR logic to refine the monitor selection before applying tag modifications.

- Click Filter Monitors.
- In the Tags field, select the desired tags, or click Add Tag to create a new one.
- For Operation, choose how the tags should be applied:
- Append: Adds the selected tags alongside the existing tags already associated with the monitors
- Overwrite: Replaces all the existing tags on the selected monitors with the newly selected tags
- Remove: Removes the selected tags from the monitors
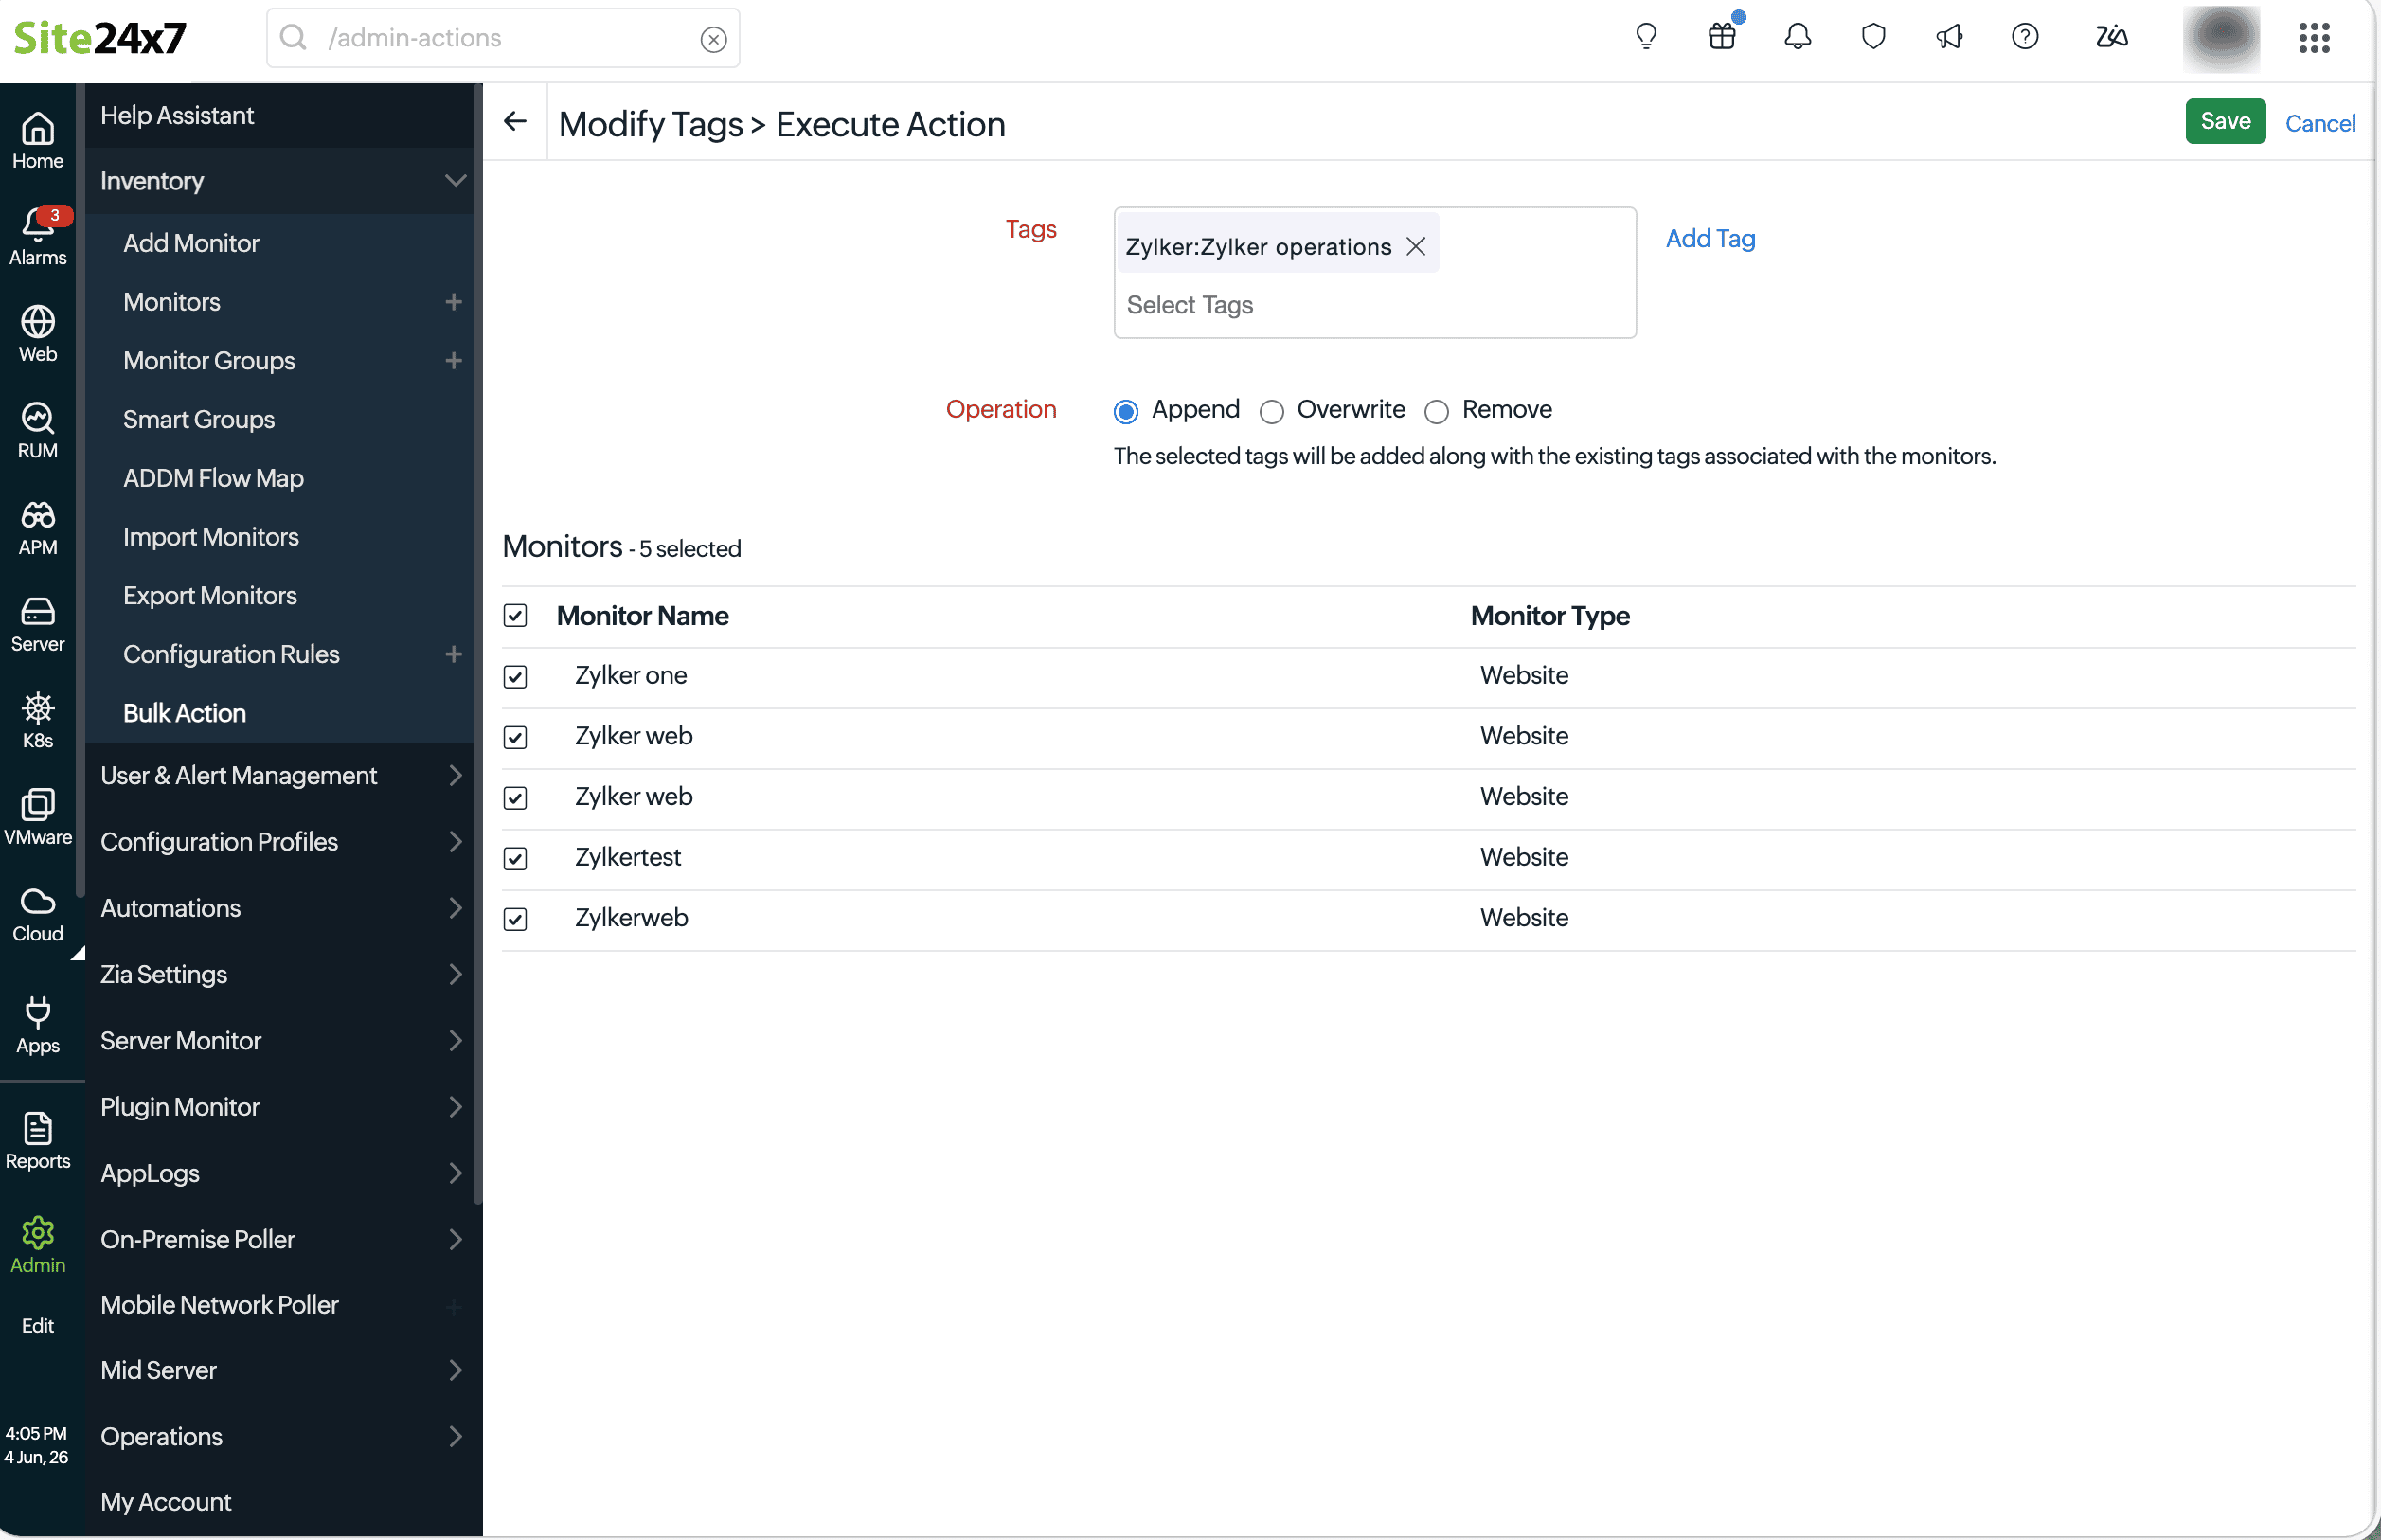
- Review the list of monitors displayed in the Monitors section to confirm the correct monitors are selected.
- Click Save to apply the tag changes across all selected monitors, or click Cancel to discard the action.
Associate tags with monitors
You can associate tags directly with a monitor from the monitor list view and quickly identify tagged resources.
To associate tags with a monitor:
- Navigate to Home > Monitors.
- Locate the monitor with which you want to associate a tag. Click the Tag icon
 displayed next to the monitor name.
 - In the Tags pop-up window:
- View the existing User Defined Tags and inherited Monitor Group Tags associated with the monitor.
- Enter the Tag Name and Tag Value in the Add/Update and Associate Tag section.
- Select a color to visually identify the tag.
- To add multiple tags at once, separate them with commas in the Tag Name field.
- Click Save.
Once associated with a monitor, tags are displayed next to the monitor name in the monitor list. Hover over or click the Tag icon ![]() to view all the tags associated with the monitor.
to view all the tags associated with the monitor.
- Tags inherited from a monitor group are displayed under Monitor Group Tags and cannot be modified from the monitor level.
- User-defined tags can be added, updated, or removed directly from the monitor.
Associate tags with monitor groups
You can associate tags directly with a monitor group by following the steps below:
- Navigate to Home > Monitor Groups.
- Click the hamburger icon
 next to the monitor group with which you want to associate a tag and select Edit.
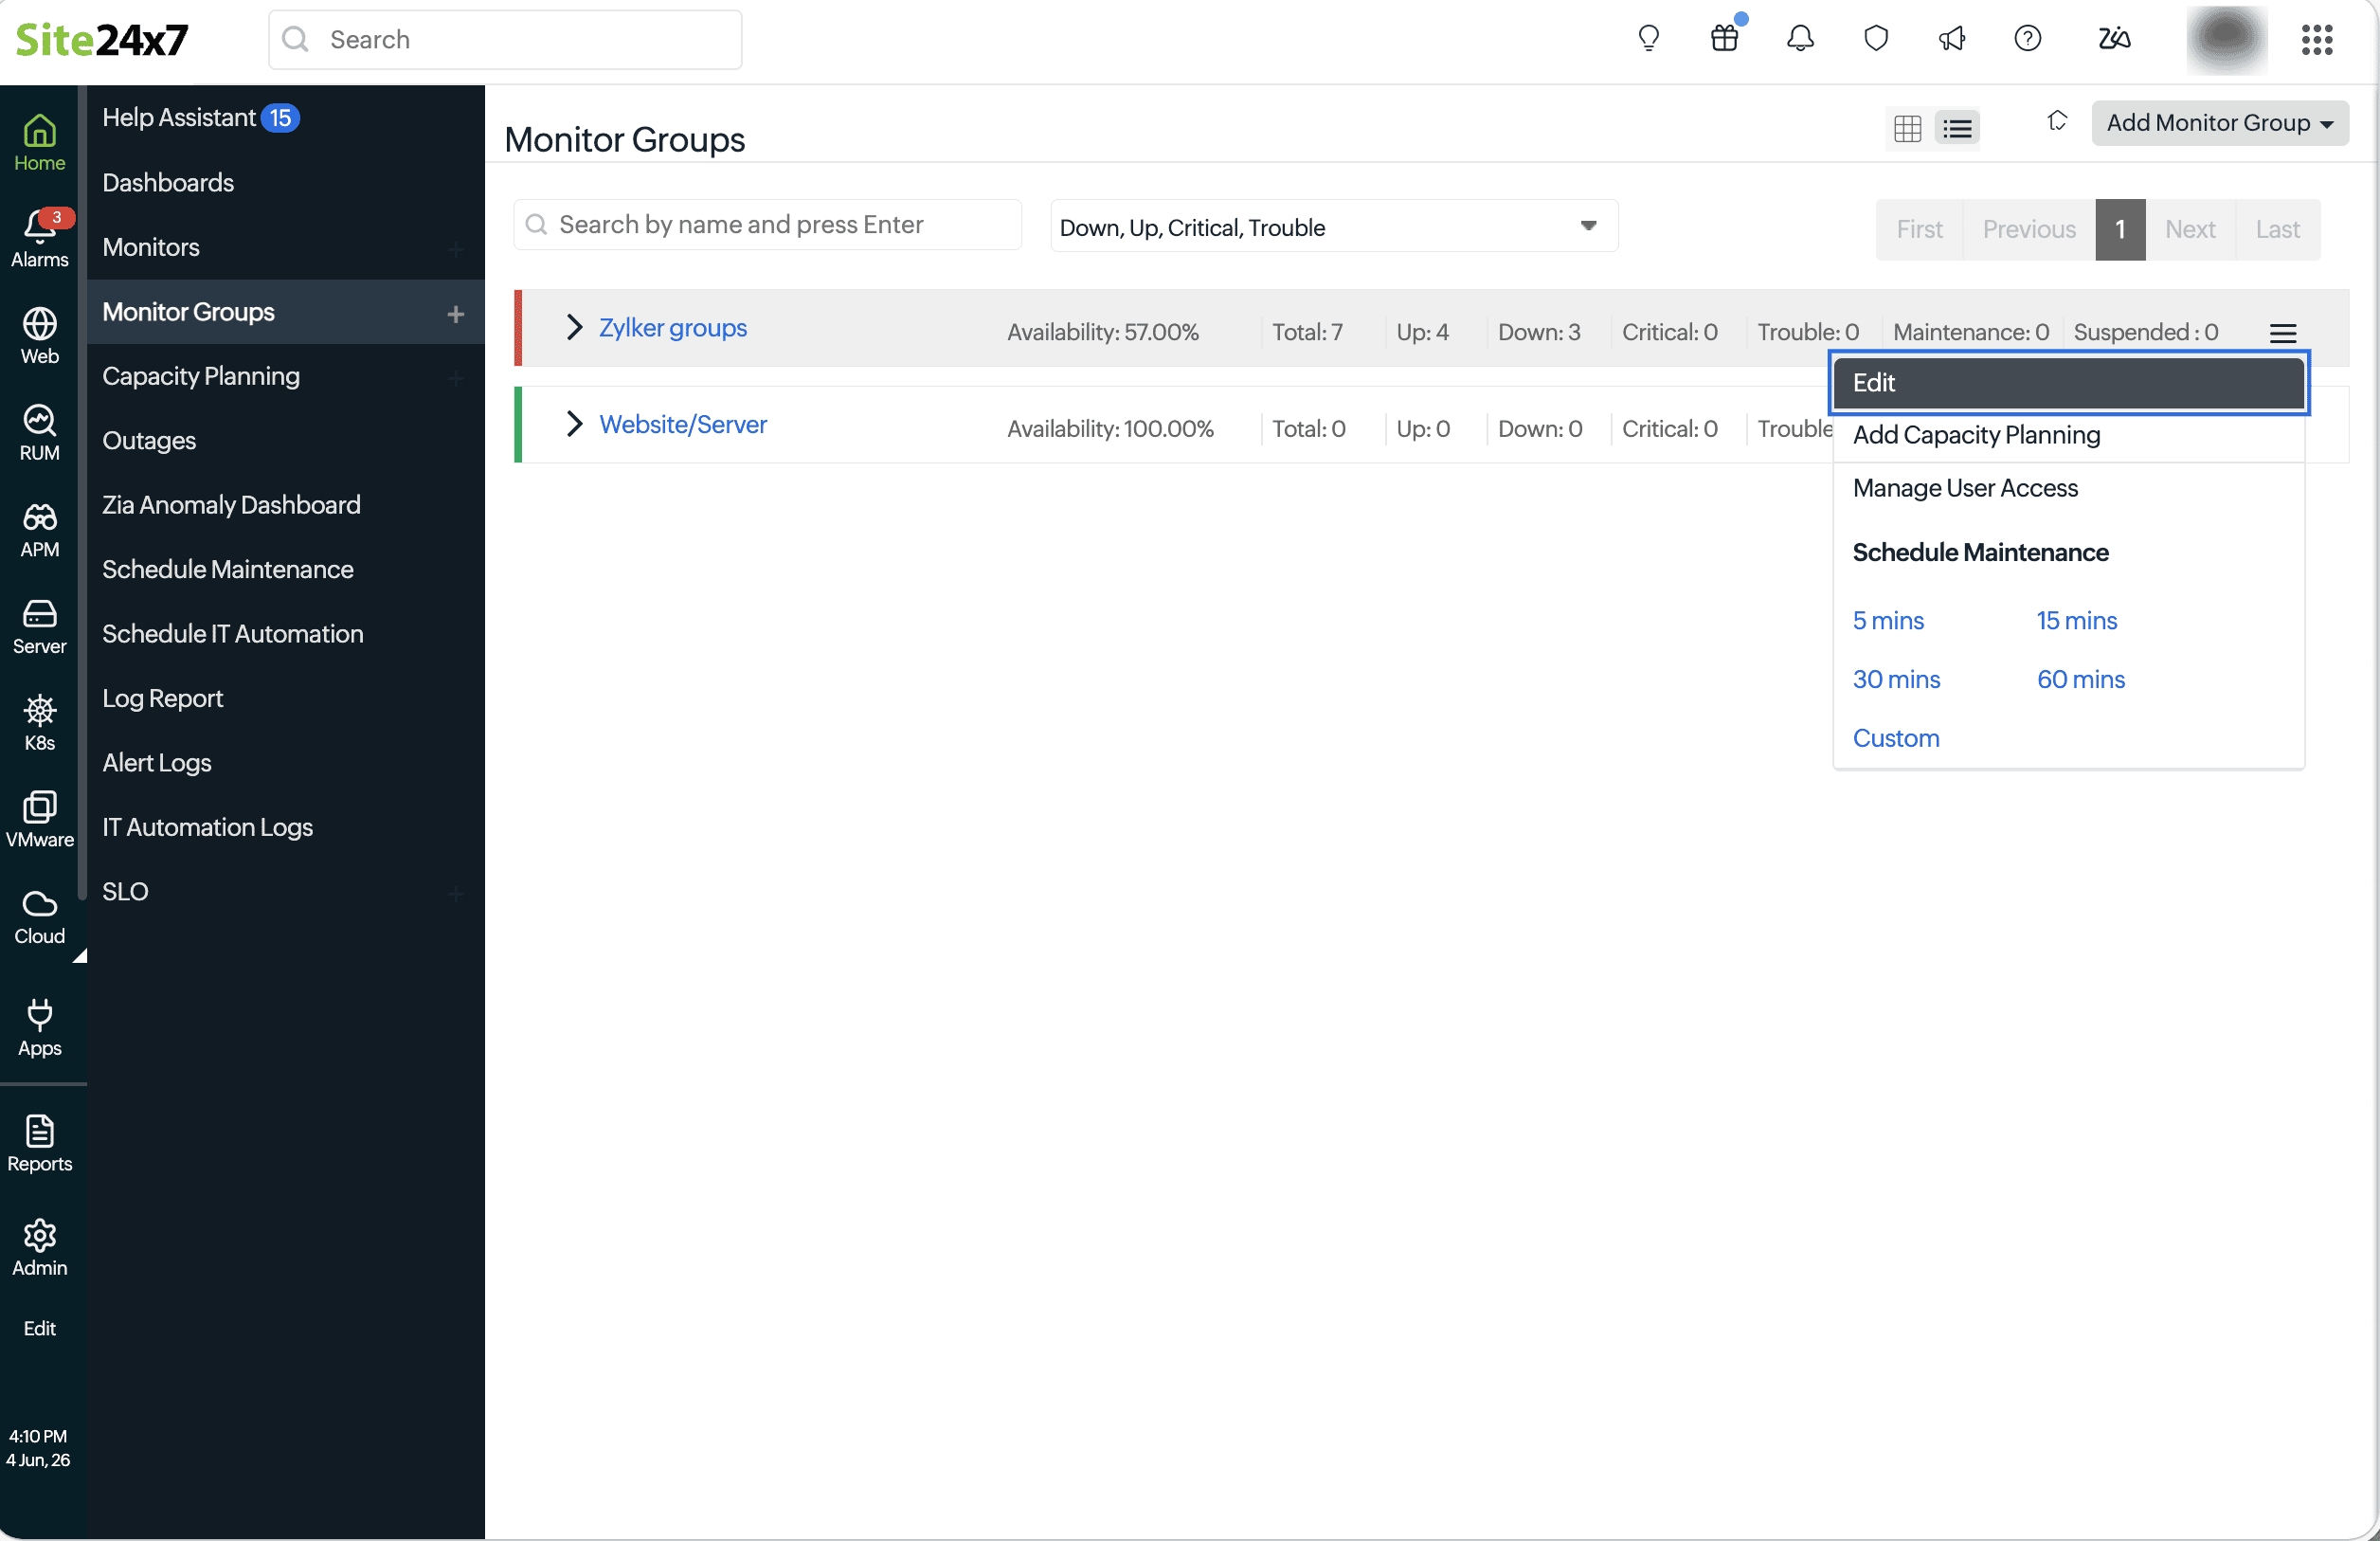
- On the Edit Monitor Group page, in the Configuration Profiles section, select the desired tags from the Tags drop-down menu and click Save.
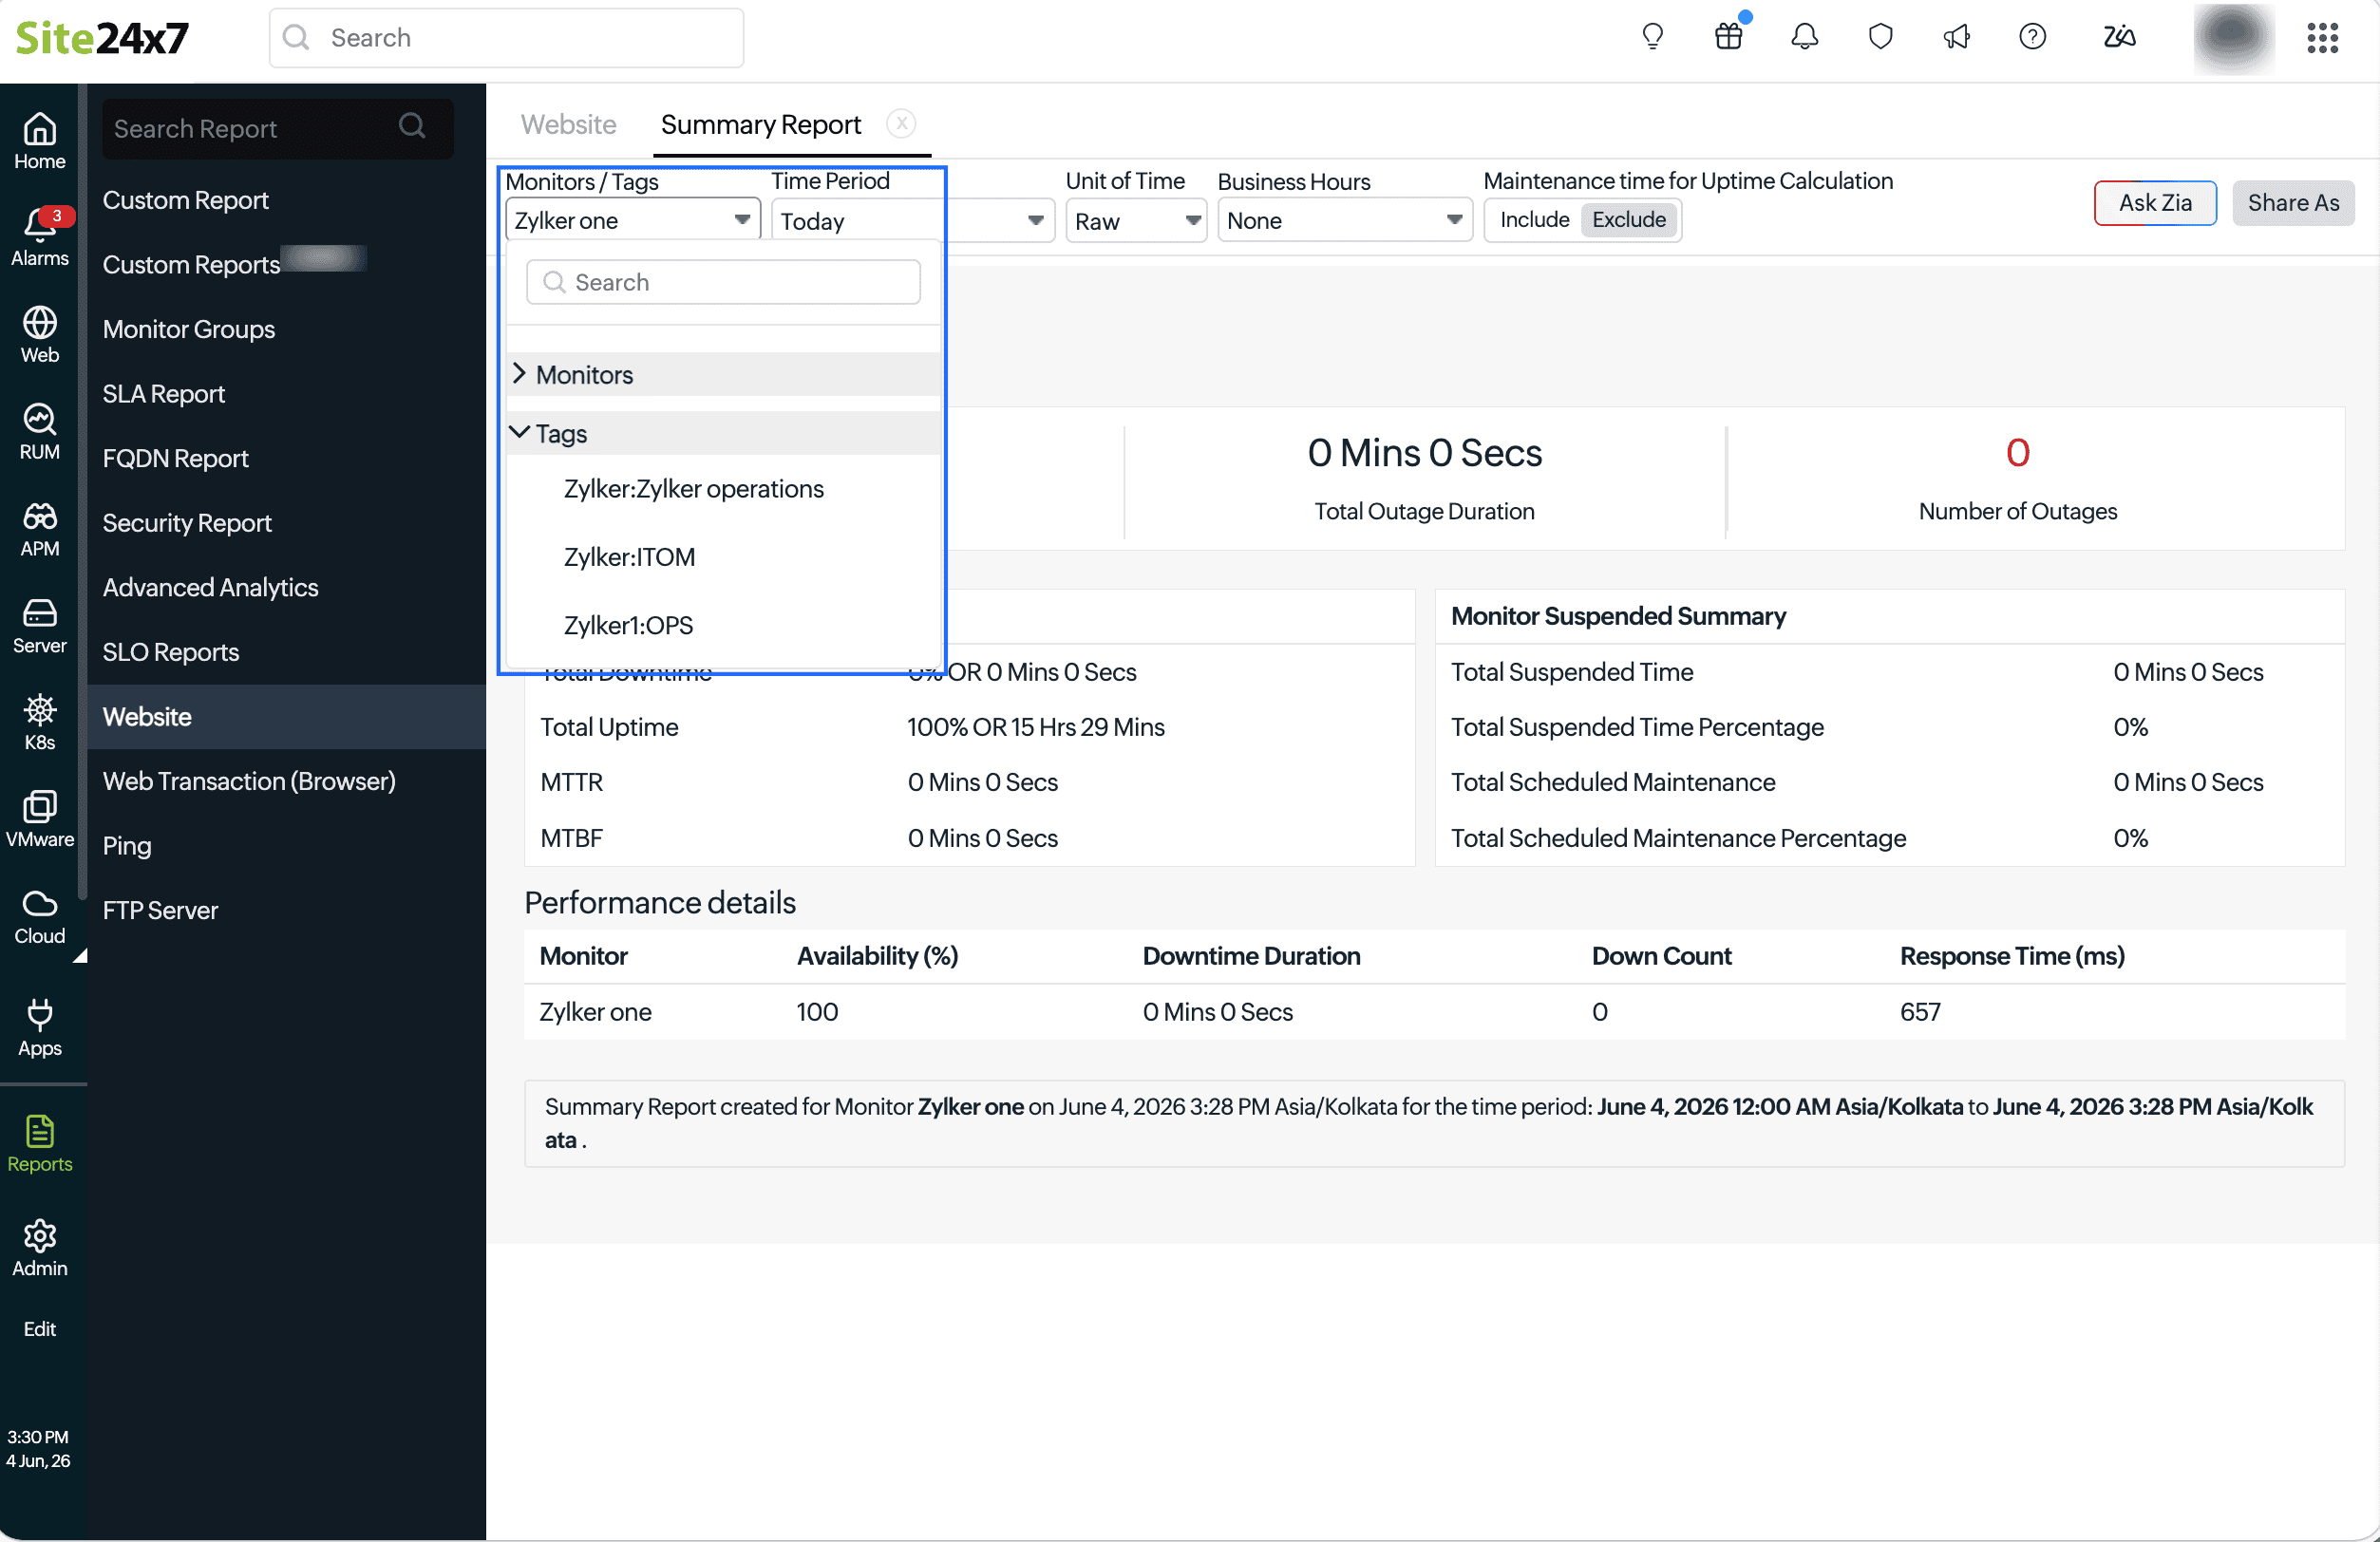
Tag-based reports
Tags help you filter and generate report views for specific business units, environments, applications, teams, or any custom grouping. Follow the steps below to view reports based on tags:
- Navigate to Reports.
- Select the desired report.
- From the Monitors / Tags drop-down menu, select the tag for which you want to generate the report.
When generating a report for a specific monitor type, selecting a tag filters the report to include only monitors of that type that have the selected tag. For example, if you generate a Summary Report for website monitors and select the tag Zylker , the report will include all website monitors associated with the Zylker tag.
The report will include the performance and all the metrics of all monitors that are associated with the selected tag.
- System-generated tags cannot be edited or deleted.
- Imported tags are managed by the source integration.
- The tag synchronization availability depends on the integration type.
- Some monitor types may not support all tag operations.
- Tag updates may take time to be applied after synchronization.
Best practices
To simplify tags usage in monitoring:
- Use consistent naming conventions across environments.
- Organize monitors using environment, team, or application-based tags.
- Use automation-friendly tags for configuration rules and workflows.
- Avoid excessive or duplicate tagging to maintain clarity.
Related articles
- Tag-based AWS monitoring
- Tag-based OCI monitoring
- Azure tag support
- VMware NSX-T monitor management
- Cisco Meraki monitoring
Video
Watch this video for a quick tutorial on how you can leverage the tag functionality to organize your resources in Site24x7.