Threshold and availability profiles for BGP Route monitor
A BGP Route threshold and availability profile lets you define the conditions that determine when Site24x7 should generate alerts for BGP routing anomalies. You can configure thresholds for events such as route hijacks, route leaks, AS path changes, route flaps, Resource Public Key Infrastructure (RPKI) validation failures, and changes in the number of advertised prefixes.
By associating a threshold profile with one or more BGP Route monitors, you can ensure consistent alerting behavior across your monitored IP prefixe without configuring thresholds individually for each monitor.
Add threshold and availability profile
Follow the below steps to add the threshold and availability profile:
- Log in to your Site24x7 account.
- Click Admin > Configuration Profiles > Threshold and Availability.
- Click Add Threshold Profile > Threshold Profile on the Threshold and Availability page.
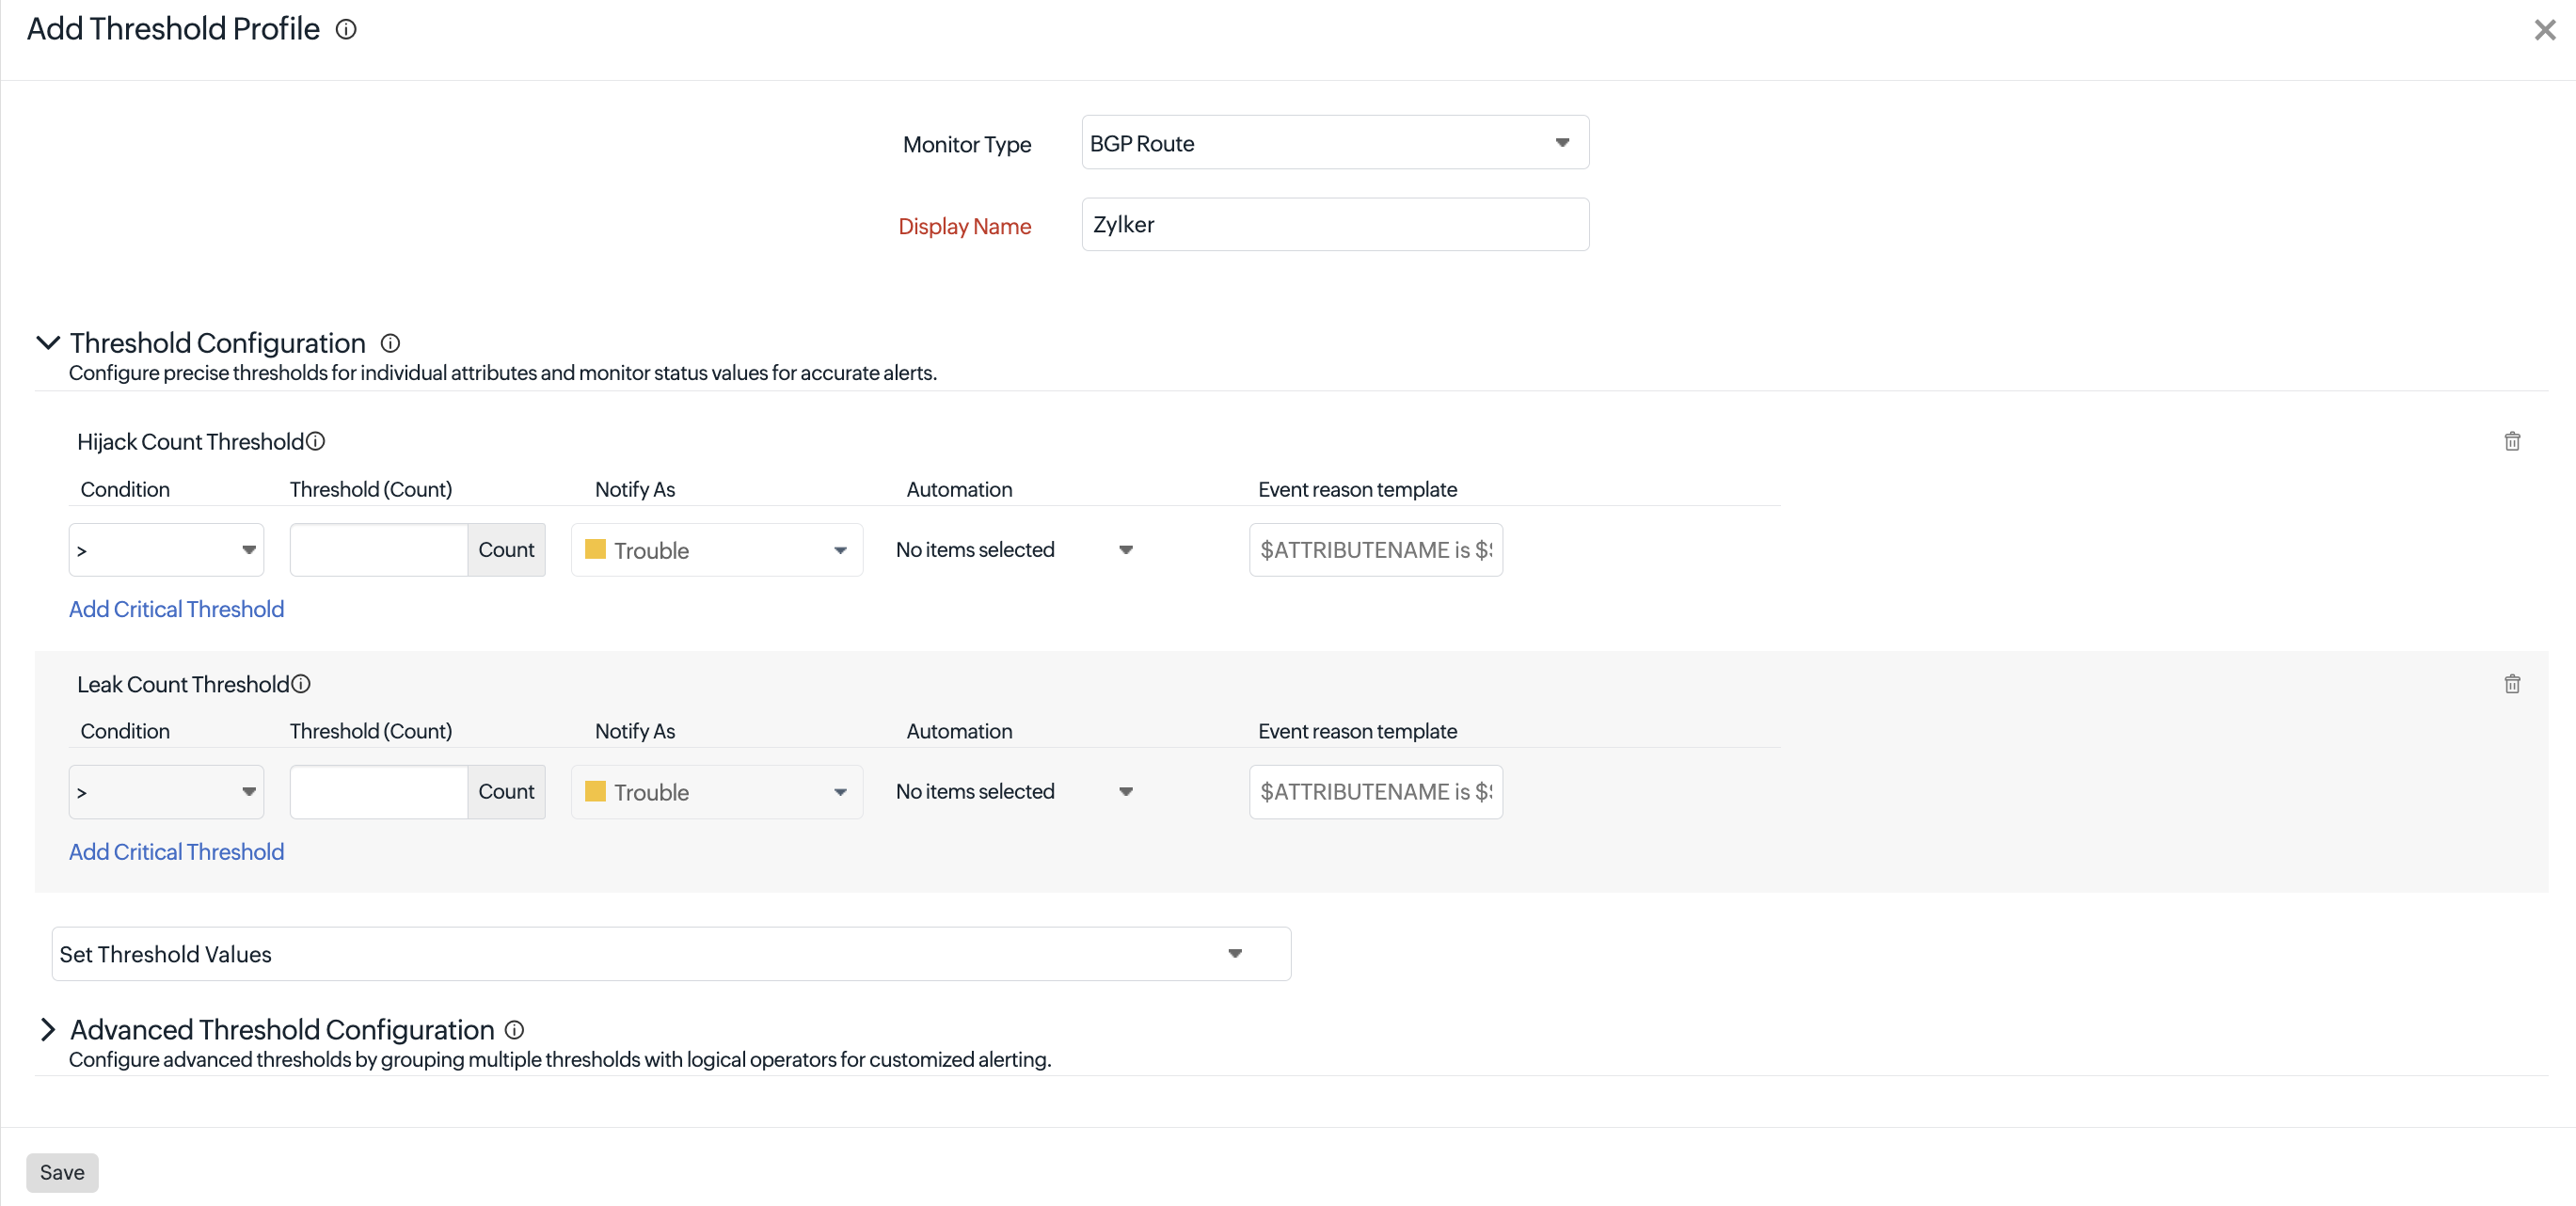
- Specify the following details:
- Monitor Type: Choose BGP Route from the drop-down list.
- Display Name: Provide a label for identification purposes.
- Provide the details for the Threshold Configuration:
Configure thresholds for the selected BGP routing metric by choosing the comparison operator ( <, ≤,=,>, or ≥ ), specifying the threshold count, selecting the monitor state (Notify As ), and optionally associating an IT Automation template. Site24x7 generates alerts and changes the monitor status when the configured threshold conditions are met. Click Add Critical Threshold to configure an additional critical threshold for the metric. - Hijack Count Threshold: Defines the number of detected route hijack events that should trigger an alert.
- Leak Count Threshold: Defines the number of detected route leak events that should trigger an alert.
- Path Change Threshold: Defines the number of AS path changes allowed before generating an alert.
- Route Flap Count Threshold: Defines the number of route flap events allowed before generating an alert.
- RPKI Invalid Count Threshold: Defines the number of invalid RPKI route validation events that trigger an alert.
- Click Save to save the threshold and availability profile for BGP Route monitor.
- Advanced Threshold Configuration: Set complex alert conditions using logical operators across multiple attributes to detect anomalies precisely using advanced threshold settings.
A default Threshold and Availability profile for BGP Route monitor will be automatically listed on the Threshold and Availability screen when users click Admin > Inventory > Monitors > Add Monitor > BGP Route for the first time.
Edit a threshold and availability profile
- Go to Admin > Configuration Profiles > Threshold and Availability.
- Click the profile that you'd like to edit.
- Edit the necessary threshold and availability settings in the Edit Threshold Profile window.
- Click Save.
Delete a threshold and availability profile
- Go to Admin > Configuration Profiles > Threshold and Availability.
- Click the profile that you'd like to delete in the Threshold and Availability screen.
- Click the hamburger icon
 and choose Delete or click on the profile you would like to delete. This will redirect you to the Edit Threshold Profile window.
 - Click Delete on right corner of the window.
Associate a threshold profile with the monitor
- Navigate to Web > BGP Route.
- Click the hamburger icon next to the desired BGP Route monitor, and click Edit.
- In the Edit monitor window that opens, under Configuration Profiles > Threshold and Availability, choose a threshold profile from the drop-down menu. You can also add a new profile, and click Save.